
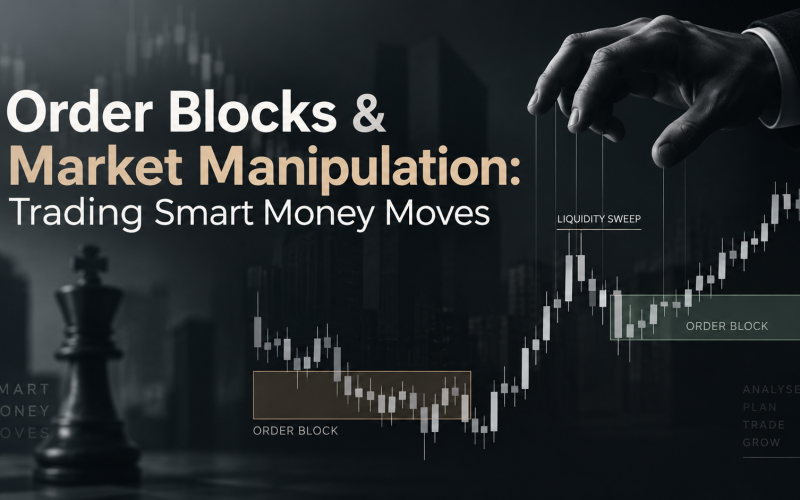
Order Blocks & Market Manipulation: Trading Smart Money Moves
💡 Quick Summary
Order blocks are price zones where BANKS and SMART MONEY (large traders) accumulated positions and then stopped. Understanding order blocks reveals what banks are doing. They use liquidity sweeps: price breaks past support/resistance (trapping retail traders), then immediately reverses hard. The reversal from the order block zone is 80-85%+ probability. Professional traders FOLLOW SMART MONEY. When banks sweep liquidity (break support then reverse), they’re buying or selling. We trade with them, not against them. This guide teaches: what order blocks are, liquidity sweeps, bearish vs bullish blocks, how to identify them, reading price action clues, trading setups, combining blocks with support/resistance, and building 80-85%+ accuracy systems. By the end, you’ll catch 200-500+ pip reversals by trading WITH smart money.
Why Smart Money Manipulates (The Bank Strategy)
Retail traders look at chart: “Support at 1.0900, I’ll place buy orders here.”
Banks KNOW this. They want those buy orders. Here’s the tactic:
- Sweep liquidity: Price breaks BELOW 1.0900 (support), triggering stop losses and panic sells from retail
- Collect liquidity: Banks SELL into the panic, accumulating positions at cheapest prices
- Reverse hard: Once liquidity collected, banks push price back UP past 1.0900
- Run to target: Price rockets up to next resistance
- Banks profit: Bought low, sold high, caught all the retail stops
💚 The Secret: Banks manipulate price to collect liquidity (retail stops and orders). The zone where they accumulate = order block. When price returns to order block = reversal likely. We follow banks, not fight them. Same move, different perspective = different profits.
What Are Order Blocks? The Foundation
Order Block Definition:
A price zone where smart money (banks/institutions) accumulated positions BEFORE a reversal. When price returns to the block, reversal probability = 80-85%.
Why Banks Create Order Blocks:
- To collect liquidity: Sweep support/resistance to trigger stops and panic sells
- To accumulate positions: Buy at best prices (after stopping out retail)
- To control price: Once positioned, push price in desired direction
- To profit: Sell when retail chases them higher
Two Types of Order Blocks:
- Bearish Order Block: Zone where bears (sellers/shorts) accumulated. When price returns = reversal DOWN likely.
- Bullish Order Block: Zone where bulls (buyers/longs) accumulated. When price returns = reversal UP likely.
Anatomy of a Liquidity Sweep (Complete Process)
EUR/USD 4-hour chart – Bearish Setup:
Phase 1: Retail Places Buy Orders at Support
- Price bounces at 1.0900 support three times
- Retail traders: “1.0900 = support, I’ll buy here”
- Retail accumulates buy orders BELOW 1.0900 (stops)
Phase 2: Banks Sweep (Break Support)
- Banks PUSH price below 1.0900 (sweep!)
- Retail stops trigger at 1.0890-1.0895
- Panic selling accelerates price further (to 1.0880)
- Banks COLLECT all these sells (buy from panicked retail)
- Zone 1.0900-1.0880 = Bearish Order Block (where banks bought)
Phase 3: Banks Reverse (Push Back Up)
- Banks have positions, push price back UP
- Price rallies through 1.0900 (retail stops triggered earlier now see losses turning green, hold)
- Price continues to 1.0920
- Retail traders: “Whoa, I got stopped out at 1.0890! Trend reversing!”
- Retail FOMO buyers chase price up (retail buying, banks selling)
Phase 4: Banks Exit (Sell to Retail)
- Price approaches 1.0950 (previous resistance)
- Retail FOMOs in to buy: “Going to break through!”
- Banks sell their positions to retail at high prices
- Price stalls, reverses down
- Banks profit: Bought at 1.0880 (order block), sold at 1.0950
The Order Block Zone: 1.0900-1.0880
When price returns to this zone later = high probability of reversal (bearish block = reversal DOWN likely)
💚 Key Insight: Order blocks aren’t random. They’re where smart money accumulated. The tighter the order block (narrow zone), the more aggressively smart money will defend it.
Bullish vs Bearish Order Blocks: Identifying Each
🔴 Bearish Order Block (Reversal DOWN)
What it is: Zone where sellers accumulated positions (sold at top, pushed price down)
Formation Process:
- Price rallies to resistance, retail buys
- Banks sweep resistance (push above, then reverse)
- Panic selling at top (1.0950 area = bearish order block)
- Banks collected sells at resistance
- Banks now SHORT, need price to fall
Trading Setup:
- Identify bearish block at resistance zone
- When price returns to bearish block = SHORT opportunity
- Entry: When Shooting Star or Engulfing forms at block
- Stop: 10-15 pips above block
- Target: Next support level
- Win rate: 80-85% on confirmed block reversals
Real Example (EUR/USD):
Bearish block at 1.0950. Price approaches 1.0950. Shooting Star forms. SHORT at 1.0945. Stop 1.0965. Target 1.0900 = +45 pips
🟢 Bullish Order Block (Reversal UP)
What it is: Zone where buyers accumulated positions (bought at bottom, pushed price up)
Formation Process:
- Price falls to support, retail sells
- Banks sweep support (push below, then reverse)
- Panic buying after sweep (1.0880 area = bullish order block)
- Banks collected buys at support
- Banks now LONG, need price to rise
Trading Setup:
- Identify bullish block at support zone
- When price returns to bullish block = BUY opportunity
- Entry: When Hammer or Engulfing forms at block
- Stop: 10-15 pips below block
- Target: Next resistance
- Win rate: 80-85% on confirmed block reversals
Real Example (EUR/USD):
Bullish block at 1.0880. Price approaches 1.0880. Hammer forms. BUY at 1.0885. Stop 1.0865. Target 1.0950 = +65 pips
Quick Comparison
| Block Type | Location | Smart Money Position | When Price Returns | Trade |
|---|---|---|---|---|
| Bearish Block | At resistance (top) | SHORT positions | Reversal DOWN likely | SHORT |
| Bullish Block | At support (bottom) | LONG positions | Reversal UP likely | BUY |
How to Identify Order Blocks (4-Step Process)
Step 1: Find the Liquidity Sweep
- Look for price breaking past previous support/resistance
- The break should be FAST (not slow, gradual)
- Should happen with increased volume (banks pushing hard)
- Look for large candle wicks into support/resistance
Step 2: Identify the Panic Zone
- After the sweep, where did stops get triggered?
- Where did panic selling/buying occur?
- This zone = order block
- Example: Support breaks, price falls to 1.0880 in panic = order block 1.0900-1.0880
Step 3: Look for Immediate Reversal
- After sweep, does price reverse QUICKLY?
- Quick reversal = smart money already positioned = now they push opposite direction
- Slow reversal = might be legitimate directional move (skip order block)
Step 4: Mark the Block
- Highlight the zone where liquidity was collected
- This becomes your trading zone for future reversals
- Note: Blocks repeat! Price often returns multiple times
💚 Pro Tip: Tighter order blocks (narrow zones) = more significant. Loose blocks (wide zones) = less reliable. Best blocks are 5-15 pips wide at the most.
Trading Order Blocks: Complete Setup
Step-by-Step Order Block Trading:
- Open 4-hour or daily chart
- Scan for past liquidity sweeps (breaks of support/resistance)
- Identify order blocks (panic zones after sweeps)
- Mark all bullish and bearish blocks
- Note: Which blocks are still “active” (price hasn’t returned yet)?
- Watch current price: Is it approaching a known block?
- When price nears block: Wait for confirmation candle (Hammer, Shooting Star, Engulfing)
- Enter: When confirmation candle closes
- Stop: 10-15 pips beyond block
- Target: Next support/resistance
- Execute: 5+ confirmed block trades
Real Trading Example: Complete Order Block Setup
GBP/USD 4-hour chart
Historical Setup (2 weeks ago):
Price rallies to 1.2900, retail buys. Banks sweep above 1.2900, then reverse hard. Panic selling creates bearish order block at 1.2900-1.2890.
Current Setup (Today):
Price rallies back up. Approaching 1.2895 (bearish block area). Volume increasing as price approaches block.
Confirmation:
Shooting Star forms at 1.2900 (at bearish block, large upper wick, close at bottom)
Trade Execution:
Entry: SHORT when Shooting Star closes at 1.2900
Stop: 1.2920 (15 pips above block)
Target 1: 1.2850 (support) = +50 pips
Target 2: 1.2800 (major support) = +100 pips
Result: Price falls to 1.2850 = +50 pips from block reversal
Combining Order Blocks with Price Action (Maximum Edge)
Setup #1: Order Block + Support/Resistance Convergence
- Bullish order block at 1.0880
- Previous support also at 1.0880 (CONVERGENCE)
- When price reaches 1.0880 + Hammer forms = 85%+ accuracy
Setup #2: Order Block + Trend
- Uptrend in place (price above moving averages)
- Bullish order block at 1.0880
- Price pullback to block + Hammer = trend continuation BUY = 85%+
Setup #3: Multiple Order Blocks (Stacked)
- Bullish block at 1.0880
- Another bullish block at 1.0870 (earlier liquidity)
- STACKED blocks = ultra-strong support = reversal 90%+
Setup #4: Order Block + Volume Surge
- Price approaches bullish block
- Volume INCREASES at block zone (smart money accumulating again)
- Reversal confirmation + volume = 85%+ accuracy
💚 Professional Rule: Order block alone = 75-80%. Order block + price action = 80-85%+. Order block + price action + support/resistance convergence = 85-90%+. Stack confirmations.
Common Order Block Mistakes
❌ MISTAKE #1: Identifying Blocks Incorrectly
You think price breaking support = bearish block. Actually, it could be bullish block (banks bought the support break).
Solution: Watch what happens AFTER the sweep. Quick reversal = that was the accumulation zone = opposite block.
❌ MISTAKE #2: Trading Blocks Without Confirmation
Price reaches block, you SHORT immediately. No reversal candle. Stop hit.
Solution: WAIT for candlestick confirmation (Hammer, Shooting Star, Engulfing) at block.
❌ MISTAKE #3: Ignoring Stale Blocks
Old order block from 3 months ago. Price doesn’t respect it anymore.
Solution: Use recent blocks (1-4 weeks old). Older blocks fade in relevance.
❌ MISTAKE #4: Trading Against Smart Money
You see order block, but trend is strong in opposite direction. Price breaks through block.
Solution: Check trend. If strong trend, block might be overridden. Wait for trend change before trading block.
🎯 Key Takeaways: Order Block Mastery
- Order blocks = zones where smart money accumulated positions: When price returns, reversal 80-85%+.
- Liquidity sweep = smart money trap: Break support to trigger stops, collect liquidity, then reverse.
- Bearish order block: At resistance, smart money shorted. When price returns = reversal DOWN likely.
- Bullish order block: At support, smart money longed. When price returns = reversal UP likely.
- Smart money accumulation zone: After sweep, price quickly reverses = banks positioning = they’ve accumulated.
- Follow smart money, not fight: When banks accumulate at block + reverse, we trade WITH them.
- Order block identification: Find sweeps → identify panic zone → mark block → wait for price return → trade with confirmation.
- Confirmation required: Never trade block without reversal candle (Hammer, Shooting Star, Engulfing).
- Stacked blocks = ultra-strong: Multiple blocks at same level = 90%+ reversal probability.
- Order block + support/resistance = 85-90%+: When block zone = confluence with level.
- Fresh blocks best: Use blocks from 1-4 weeks ago. Older blocks lose relevance.
- Tight blocks most powerful: 5-15 pip wide blocks = more significant than loose 50+ pip blocks.
- Professional rule: Smart money = 80%+ of market participants, 20%+ of profit distribution. Trade with them.
- Olympus setup: Raw account + 4-hour/daily charts + order block scanner = smart money trading
